Are You Wondering How to Disassemble Hoover Windtunnel Vacuum?
When your vacuum cleaner does not suck away the dirt and debris entirely, you may need to look for the solution. Hoover WindTunnel helps you keep your house clean and fresh and sometimes needs cleaning too. Since your appliance removes the dirt regularly, it does get dirty too. Therefore, to make it work efficiently, you may need to disassemble it. if you are a newbie in this, you may contemplate the question “how to disassemble Hoover WindTunnel vacuum.”
What Are Hoover Windtunnel Vacuums?
The Hoover Windtunnel Air upright vacuum cleaner has the power to suck up everyday dust, dirt, and pet hair. It has the ability to clean the floor within a 30-foot radius thoroughly. Furthermore, the Hoover Wind Tunnel can easily vacuum under furniture.
Features of Hoover Windtunnel
The Hoover WindTunnel vacuum cleaner has many features. Following are some of its components;
- It uses multi-cyclonic technology that helps clean consistently.
- It does not lose suction
- Suction power technology removes the dirt from the hard floor
- The filters used in it can be removed, washed, and reused easily.
- It is a bagless, lightweight, and multi-floor vacuum cleaner.
How To Use Hoover Windtunnel Vacuum
The Hoover wind tunnel vacuum is a complete unit, but the handle is separate and must be attached to the vacuum. Therefore, before using the wind tunnel, follow the given steps;
- cut the power source
- The handle has four screws covered by cardboard. Remove the screws using a screwdriver.
- Put the handle in the right place in the vacuum cleaner and tighten the screws.
In addition, when vacuuming your carpets, adjust the vacuum power brush height.
- Adjust the brush height according to the size of your carpet.
- Press the button to switch it on and start vacuuming.
Here, the indicator light shows the vacuuming of carpets. The red light indicates that the rug is not cleaned properly. And the green light shows that the first and most of the dust have been removed completely.
How To Disassemble A Hoover Windtunnel Vacuum Cleaner
The Hoover wind tunnel vacuum keeps the floor clean, but it also needs to be clean. You can keep your WindTunnel clean by separating its
parts. You must learn how to disassemble your Hoover wind tunnel vacuum cleanerthere.
1. Remove The Windtunnel’s Lid
First of all, you need to open the lid which is present in the storage chamber. The lid is open for the tools and attachments. Then remove the tools and attachments for the further process.
2. Disassemble The Dirt Cup
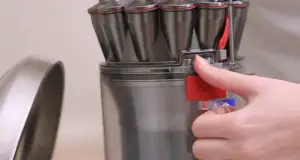
Move the lever on the dirt cup to the side smoothly. Pull the cup gently and remove the cup straight. Now, disassemble the dirt cup by removing the plastic cover on the dirt cup. Most of the wind tunnel models have a lever on the left side.
3. Take Out The Filter
Once the dirt cup has been removed, remove the filter. Pull the filter assembly straight up. Take out the filter from the cup. The filter door is present on the side of the vacuum. Bring the doors up to their hinges. Remove the filter from the filter chamber.
4. Unlock The Screws That Secure The Headlight Lens
The two screws secure the headlight lens. Remove these screws that are located beneath the upright wind tunnel vacuum cleaners. When you remove the lens, then remove the headlight bulb.
5. Take Out The Bottom Plate
Remove the bottom plate by placing the machine on its back. Two to four screws cover the base plate. Open all the screws to remove the plate. When you remove the plate, remove the brush assembly. Pull the brush belt out from the vacuum body.
6. Disconnect The Hose From the vacuum’s Body
Remove the hose from the vacuum. The hose is connected to the vacuum either by screws or the clamp. Unscrew the hose and remove it from the vacuum.
7. Remove The Vacuum’s Handle
Unlock all the screws that secure the vacuum handle. When you remove all the screws, pop up the handle to remove it from the vacuum cleaner.
Helpful Tips to Clean Hoover Windtunnel Vacuum
When you have disassembled your hoover wind tunnel vacuum, now it is time to clean your hoover vacuum cleaner. You can follow the following steps to clean the WindTunnel vacuum.
1. Clean The Primary And HEPA Filters
Cleaning the filters keeps the performance of the WindTunnel vacuum at its peak. Clean your ordinary filter every two months. And clean the HEPA filter.
To clean the primary filter;
- Remove it from the dirt cup.
- Then wash it under the water.
- Do not place the wet filter back in a vacuum.
- Then remove the second, which is known as the HEPA filter.
- Do not wash the HEPA. Only tap the end and remove the dirt from
2. Clean The Dirt Cup
After cleaning the filters, the next step is to clean the dirt cup. It is important to Clean the dirt cup regularly before it reaches the max level. Therefore, to improve the performance of the hoover wind tunnel vacuum cleaner, thoroughly clean the dirt cup. When you have cleaned the vacuum, place the filter assembly back in the vacuum and check it.
Bottom Line
Well, making your appliance work properly and effectively is not a difficult thing. For this, cleaning your hoover WindTunnel is imperative. Your appliance does a job of providing you with a house that is dirt and debris free, and because of this, regular cleaning of your machine is quite important.
Follow the above-mentioned steps and escalate your machine’s suction power.


