Guide on How to Attach Dyson Vacuum Attachments?
Many people question how to attach Dyson vacuum attachments? Or How often do your vacuum attachments get lost or misplaced?
Dyson Vacuums are engineered with the latest technology to clean your home like never before, but sometimes you need extra tools to do the job right. Here at Dyson, we have created several attachments that can be used with our vacuums to give you more options when it comes to cleaning your home.
This blog post will show you how to attach and use these helpful vacuum attachments!
Things to Consider before Attaching Dyson Vacuum Attachments?
You can put attachments on your Dyson vacuum by various methods that are discussed below in detail. Before digging into any of those methods, knowing all procedures’ common basic steps is essential. Therefore, if you want to put an attachment on your Dyson vacuum, you will have to press the red button near the base of the handle. When you press it, you will be aiding it into a release resulting in its conversion into a handheld wand. Now, you will have to connect the hose to the handle’s top and slide your attachment, whatever type it is, into the opening located at the opposite end of the wand.
You can find various types of Dyson vacuum attachments in the market that are designed according to your needs and requirements. These attachments can help you clean carpets, pet fur, sensitive surfaces, and many other surfaces efficiently. Now, without wasting any more time, let’s dig into the different types of methods that will help you put an attachment on your Dyson vacuum without much effort. Moreover, this method will help you put on the attachments and guide you on using these attachments effectively for various surfaces and angles.
How to Attach Dyson Vacuum Attachments?
Here is a comprehensive guide on putting attachments onto a Dyson vacuum. Follow the below-mentioned step-by-step instructions to complete your task efficiently;
1- Turning off the vacuum
Before working with any electrical equipment, it is always safe to turn it off completely. Similarly, in this procedure, you will have to unplug your Dyson vacuum before heading into the next step of removing the wand or attaching anything onto the head of the hose. If you are not already aware, the rod is the thin pole that comes out of the handle. If you haven’t turned off the vacuum before detaching the handle, your hose may jump and fly over or even knock something down.
2- Releasing the wand
The next step involves the detachment of the releasing of the wand. For this, you will have to press the red button located on the machine’s backside at the meeting point of the rod and the frame. You will have your wand and hose removed at the same time. You will have to pull the handle up and lift the rod out to pull out the hose.
3- Flipping the plastic cover
A plastic cover is present on the top of the handle. You will have to flip this plastic cover to get access to the opening. This is the opening from where your hose slides into and connects to your wand.
4- Sliding the hose into the handle
The next step involves the sliding of the hose into the handle until you hear a clicking sound. For this, you will have to turn the wand around so that your hose and handle are facing each other. Now, slide the hose into the opening presentation on the top of the handle. Keep on sliding till you hear a clicking sound. This clicking sound is proof that your hose and wand are clicked into the place and are interlocked. After this, when you turn the vacuum on, you will see it automatically pull in air through the hose instead of the vacuum’s head.
5- Sliding the attachment
This is the step where you slide your desired attachment into the wand. To attach the Dyson attachment of your choice onto the vacuum, you will have to slide the opening to the end of the wand. Now, keep on rotating the attachment until it efficiently adheres to the end of the wand. In this case, you will not listen to any clicking sound as your attachment will comply with the hose.
Removing or changing attachments
After you have used the particular attachment, you can now press the red button again to unlock the hose from the handle. Now, slide the hose back into the required slot or point on your vacuum and flip the wand around. This will reinsert your handle. You can also take off the attachment from the end of your wand by applying a little pressure.
Choosing the Right Attachment for Different Surfaces
From the instructions mentioned above, you will quickly attach your Dyson vacuum and change these attachments whenever you want. We have listed below some of the efficient Dyson attachment ideals for various unique and sensitive surfaces.
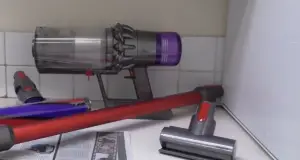
You can use a dusting brush attachment to clean surfaces that tend to be more sensitive. This dusting brush is around 4 – 8 cm in length in a rectangular shape. Moreover, this brush has a long and soft bristle coming out of it that aid in effective cleaning. You can use this attachment for cleaning sensitive or crowded window sills, lampshades, and other sensitive surfaces.
In addition to this dusting brush, another fiber soft dusting brush attachment comes for the Dyson vacuum that is excellent for cleaning fabric surfaces and rugs. This brush has a carbon fiber lining that is efficient for cleaning such sensitive surfaces.
For cleaning the hair and dirt from durable fabrics, you can use a turbo brush attachment. This brush is a motorized attachment that consists of two spinning turbines underneath. It helps remove deeply embedded dust and hair from carpets, fabric furniture, and even pet beds.
Many other attachments are also available that are specifically designed and manufactured for particular surfaces.
Conclusion
In conclusion, you can easily change various attachments on your Dyson vacuum according to your surface and cleaning requirements. The easy attachment and removal procedure also makes it easy to clean and maintain the vacuum efficiently.


